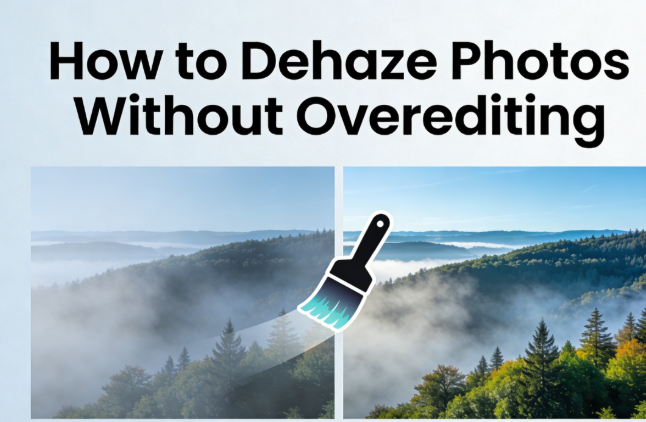
Hazy photos can ruin even the most beautiful scenes. Atmospheric moisture, fog, and pollution create a milky veil over your images. This reduces clarity and makes colors look dull. Learning to dehaze photos properly brings back detail without making them look artificial. This guide shows you simple methods to restore your images naturally.
In this article:
- How to Tell If a Photo Is Hazy
- What Dehazing Actually Does to an Image
- Quick Dehaze Workflow for Non-Professionals
- Dehaze Photo Manually for Advanced Users
- Conclusion
1. How to Tell If a Photo Is Hazy?
Identifying haze helps you choose the right correction method. Here are the main signs:
Low contrast across the entire image is the primary indicator. Hazy photos lack strong differences between light and dark areas. Everything appears flat and washed out.
Faded colors and weak shadows appear in hazy conditions. Blues often turn gray. Greens lose their vibrancy. Shadows become soft and barely visible.
Loss of depth in distant objects happens when haze blocks your view. Mountains fade into the sky. Buildings blend together. The sense of distance disappears.
How haze differs from blur or poor focus is important to understand. Blur affects specific areas and creates soft edges. Poor focus makes details fuzzy throughout. Haze creates a consistent milky layer that affects contrast and color more than sharpness.
Recognizing these signs helps you apply the correct fixes. You can target the specific problems haze creates.
2. What Dehazing Actually Does to an Image
Understanding the technical process prevents overediting. Dehazing involves several adjustments working together.
Contrast reconstruction vs sharpening addresses different issues. Dehazing rebuilds the difference between light and dark tones. It doesn’t just add edge definition like sharpening does. This makes the entire image pop without creating harsh outlines.
Color recovery and tonal separation restore the original scene appearance. Dehazing tools analyze color channels independently. They bring back blues in skies and greens in landscapes. Tonal separation helps distinguish between similar shades that haze blended together.
Why dehazing affects highlights and shadows together relates to how haze works. Atmospheric particles scatter light across the entire tonal range. Removing this effect requires adjusting both bright and dark areas. Good dehaze tools balance these changes automatically.
Potential side effects of over-dehazing include several problems. Colors can become oversaturated and unrealistic. Shadows may turn too dark and lose detail. Skies can develop unnatural gradients. Noise becomes more visible in smooth areas. The key is stopping before these issues appear.
3. Quick Dehaze Workflow for Non-Professionals
Leawo Photo Enhancer offers an easy solution for beginners. This built-in module within Leawo PhotoIns uses smart technology to fix hazy photos automatically.
Step 1: Open your photo in Leawo PhotoIns. The interface is clean and beginner-friendly.
Step 2: Select Photo Enhancer from the available modules. This activates the AI-powered enhancement tools.
Step 3: Apply automatic dehaze by clicking the enhance button. The software analyzes your image and removes haze intelligently.
Step 4: Adjust the intensity using the simple slider. Move it left to reduce the effect. Move it right to increase correction. Watch the preview change in real-time.
Step 5: Fine-tune if needed with additional controls. You can adjust brightness, contrast, and saturation separately. These optional tweaks help perfect the result.
Step 6: Save your enhanced photo in your preferred format. The software preserves image quality throughout the process.
This workflow takes just minutes. No technical knowledge is required. The AI handles complex calculations automatically while you control the final look.
4. Dehaze Photo Manually for Advanced Users
Photoshop provides precise manual control for professionals. This method requires more skill but offers maximum flexibility.
How to dehaze in Photoshop using Camera Raw:
Open your image in Photoshop. Go to Filter and select Camera Raw Filter. This opens the advanced editing panel.
Locate the Dehaze slider in the Effects section. Start with small adjustments between +10 and +30. Watch how the image changes before going further.
Combine dehaze with other adjustments for natural results. Reduce highlights to prevent blown-out skies. Lift shadows slightly to maintain detail. Adjust whites and blacks to perfect the tonal range.
Alternative method using Curves:
Create a new Curves adjustment layer. This gives you precise control over specific tonal ranges.
Steepen the curve in the midtones. This increases contrast where haze typically affects images most. Pull down highlights slightly if skies become too bright. Lift the shadow point gently to open up dark areas.
Color correction for natural appearance:
Add a Hue/Saturation adjustment layer. Increase saturation by 5-15 points depending on how much haze faded your colors.
Use selective color adjustments if certain hues need more help. Blues often need extra attention in hazy landscapes. Greens may require separate boosting in nature photos.
Local adjustments for problem areas:
Create layer masks to apply corrections selectively. Distant mountains might need more dehazing than foreground subjects.
Use gradient masks to blend adjustments smoothly. This prevents obvious transitions between corrected and uncorrected areas.
The manual approach takes practice. Start with subtle changes. Build up the effect gradually. Compare your work against the original frequently to avoid overdoing corrections.
5. Conclusion
Removing haze restores clarity and color to your photos. Simple tools like Leawo Photo Enhancer make this process quick and automatic. Advanced users gain precise control through Photoshop’s manual methods. Both approaches work when you apply corrections carefully.
The key to success is restraint. Stop editing before your image looks unnatural. Preserve some atmospheric quality for realism. Your photos will look professionally enhanced rather than obviously processed.
Start with the easiest method for your skill level. Practice regularly to develop your eye. Soon you’ll transform hazy images into stunning clear photos every time.